
How to Adjust Your Cabinet Doors and Drawers
Knowing how to adjust your kitchen cabinet hardware can help you prolong the life and beauty of your new cabinetry. CliqStudios cabinets are designed to be adjustable by the homeowner.
Each cabinet is built with several types of durable, high-performance hardware that will operate smoothly for years. Periodically, check your hardware to tighten hinge screws, realign drawers, and adjust drawer slides. Hardware can move and become loose over time.

Cabinet Hardware Adjustments
Here are some signs that your cabinet hardware may need adjusting:
- The doors or drawers are loose
- The doors don’t stay closed
- The drawer glides are sticky
- The doors or drawers are uneven, angled, or unsymmetrical
- The self-closing or soft-closing mechanism doesn’t work
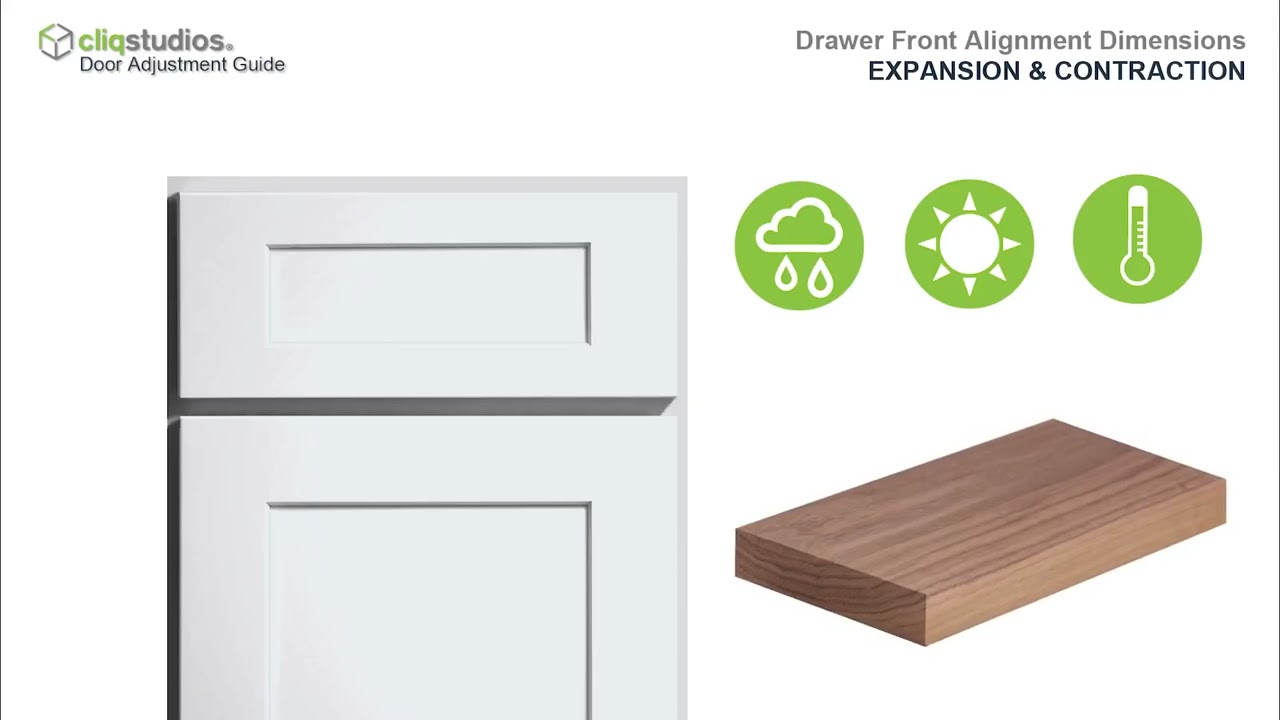
Maintenance will be needed more frequently for high-use doors and during seasonal temperature changes. Doors are typically made of hardwood, which is affected by the temperature and humidity levels. Your cabinets may require adjustments after installation as they become acclimated to the new environment.
How to Adjust Door Hinges
Before you start cabinet installation, remove the cabinet doors to protect them from being scratched or dented. Then align your cabinet doors after the cabinet boxes have been installed. Start by looking at the information your CliqStudios designer has given you about the gap dimensions for your specific cabinets.
This will help you know exactly how much space is needed on each side of the door and face frame for everything to align. Once the doors are properly adjusted, it’s time to start installing decorative cabinet hardware.
Step-By-Step Instructions
Cabinet door hinges have three adjustment screws: the cam screw, install screw and rear cam screw. The only tools and materials needed are a Phillips screwdriver. Here is how to adjust cabinet doors.
- To move the door left or right adjust the front cam screw.
- To move the door up and down, loosen the install screw and adjust as needed.
- To adjust the doors in and out, adjust the rear cam screw.
- For lighter doors, the soft close mechanism may need to be deactivated on one of the hinges for the door to close completely.
- The door must be closed once for the deactivation to be complete.

For more detailed descriptions of how to adjust cabinet door hinges, view our hardware adjustment guide.
How to Adjust Drawer Boxes and Glides
After cabinet delivery, it’s common for drawer boxes and glides to need realigning. Make it a point to inspect and realign drawer glides prior to installing your cabinets. To prevent scratches and damage, remove the drawers before installing the cabinets.
If you don’t know the gap reveal of your cabinets, talk to your CliqStudios designer. This information will help you know how much adjustment is needed to correct the glides and drawer box. After you have done your homework, it’s time to start the adjustment process.
Step-By-Step Instructions
There are two types of adjustments for drawers: one for the drawer box and one for the drawer front. Depending on the issue, one or both might be necessary to make sure everything is functioning properly.
If the drawer is closed and crooked, it’s likely that the glides in the back of the cabinet are out of alignment, so please see the adjustment recommendations below. Sometimes drawer fronts can also be crooked, but this component can be independently adjusted in any direction. To fix this issue, here is how to adjust soft close drawers.
Drawer Box Alignment


- Pull the drawer completely open and check that the white brackets are attached at the back of the cabinet and centered.
- After aligning the brackets, close the cabinet drawer to see if it closes evenly. If the drawer doesn’t shut completely, the back glide pin might not be properly inserted into the hole at the back of the drawer box.
- Pull the drawer out 15 – 20 inches and locate the tilt adjustment lever. Behind the lever is a flat metal glide pin that must be inserted into the back of the drawer to close.
- Check both the left and right sides.
Drawer Front Adjustments

- Look for the panhead screws inside the drawer box that attach the box and front together.
- Using a Phillips screwdriver, loosen, but don’t remove the screws and align each side.
- Re-tighten the screws once the drawer front is aligned.
- Use the adjustment tab on the drawer glides to adjust the drawer up and down.
- Push forward or backward to adjust the rise or fall of the drawer front.
- Check both the left and right sides.
- Next, to adjust the drawer front angle, locate the gray tilt adjustment lever at the back of the drawer box by the metal glide pin.
- Rotate the lever back and forth to adjust the drawer box angle or tilt.
- Check both the left and right sides.
Types of Cabinet Adjustments
There are three main types of cabinet adjustments to pay attention to when you receive your cabinetry; Door hinge adjustment, drawer box alignment, and drawer front adjustment. Within each of these categories, there are multiple ways to realign and level out your cabinets. All of these adjustments can be completed simply by using a Phillips head screwdriver.
If you plan to adjust an entire kitchen of cabinets, give yourself enough time to become acquainted with the hardware and how everything works. First-timers will have a learning curve before it gets easier to understand what adjustments need to be made.
Tools and Materials Needed
All that’s needed to adjust door hinges, drawer boxes and glides is a Phillips head screwdriver. CliqStudios cabinets have adjustable hinges and glides that make it easy to maintain and realign your cabinetry. Other than the screwdriver, if you are a first-time remodeler, you may need our cabinet hardware adjustment guide. This downloadable pdf provides detailed steps and images of what to look for when making your final adjustments.
Cabinet Hardware Maintenance Tips
Keep your cabinet hardware in great condition by regularly maintaining it. This includes checking your hinges and glides every 3 – 6 months. By regularly tightening and aligning the cabinet hardware, you will avoid wear and tear that could happen because of weight imbalances in your doors and drawers.
Another tip is to avoid overtightening screws. We all know that screws can get stripped if they are turned too far, so twist until they are secure then move on to the next hinge.
-

Cabinet Care and Maintenance
Cleaning, touch-ups, and general care.
-
How to Place Cabinet Hardware
Finding the right position for your knobs and pulls.

